Curried Chicken/Cheese Ball

curry/chicken/cheese ball

curried chicken/cheese ball

This incredible hors d’ouvres dates back to the early 1980’s.  My mother’s best friend, in our small Rocky Mountain village, became my treasured ally. She and her husband moved to East Glacier Park, when he retired as a screenplay writer. Talbot Jennings was so famous that a prominent New York City television station featured his movies, such as The King and I, for a whole week, before he died.

This illustrious couple traveled the world during the production of these films; thus, Betsy schooled me in her prodigious cosmopolitan ways.  I thoroughly enjoyed sitting under her tutelage, as she prepared me for the lions at Trafalgar Square and exceeding more, prior to my moving to London.  I believe she was even more excited than I, about my valiant relocation to Tokyo half a decade later.

The voluminous New York Times brought the vast outside world to Betsy every weekend.  She was forever clipping articles to prepare me for my numerous sojourns.

With this same spirit, starting in 1982, she helped me to grow as a historical caterer. My creative mentor was always sending me gifts, which she ordered from the New York Times.  Ingenious gadgets were among a wide array of superlative food items. Many of these imaginative tools still grace my kitchen today.

While I was doing my early work in Billings, Montana, I journeyed to my hometown each year, where I catered multiple theme dinners per visit. The eight-hour drive across the wide expanse of the Big Sky Country thrilled my tender soul. How I delighted in approaching the backdrop of my beloved mountains, as I gazed across those colossal open prairies.

Once there, I spent many hours drinking in wisdom at Betsy’s feet.  During one of these relished trips, she offered this  delectable cheese ball to me.  I was enamored with it then and still am today.  Then it was a frequent hors d’oeuvre at my gala catered events;  today it is still my constant contribution to every holiday meal, at which I am a guest.

May you make this blessed appetizer a family tradition as well!

Curried Chicken/Cheese Ball  Yields: 2 1/2 c.  Total prep time: 3/4 hr/ active prep time: 30 min/ inactive prep time: 15 min.  Note: you may make this a day ahead.

8 oz cream cheese, softened

1 c slivered almonds

1/2 c unsweetened coconut, finely grated  (Available in bulk, at our local Winco and other stores.)

2 tbsp mayonnaise  (Best Foods excels all other mayonnaise.)

2-3 tbsp Major Grey’s Mango Chutney  (3 spoonfuls gives full-bodied sweetness.)

1 tbsp curry powder, or to taste

1/2 tsp salt  (Himalayan, pink, or Real Salt is critical for optimum health; a fine grind Himalayan salt is available inexpensively at Costco.)

3-4 frozen tenderloins  (Natural chicken is best; Trader Joe’s works well for quality and cost.)

1-9 oz box Original Wheat Thins

  1. Preheat oven to 350 degrees.  Roast almond slivers for 10 minutes.  Remove and cool on a plate.
  2. If you are using frozen tenderloins, thaw in warm water.  Cook chicken in salted boiling water.  When center is white, after inserting a knife, remove chicken from water and cool in refrigerator on a plate.  Do not overcook to avoid toughness.
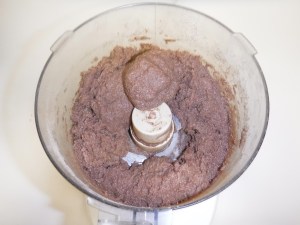
  3. Mix all the above ingredients except the chicken and almonds.  Note: it works best to insert a regular teaspoon in the narrow jar of Major Grey’s Mango Chutney, when measuring it.  Be sure to use well-rounded teaspoons, as each approximates a tablespoon, for which the recipe calls.
  4. Chop roasted almonds with a sharp knife; add to cream cheese.
  5. Leave this cream cheese mixture out at room temperature, while waiting for the chicken to cool.  When meat is cool, cut it into small pieces; finally, mix chicken into cream cheese very gently, as not to shred it.
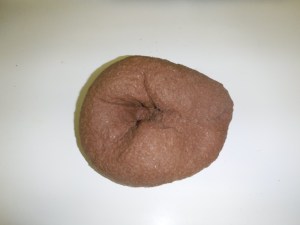
  6. Criss-cross two large pieces of plastic wrap; place chicken ball in the center of wrap.  Surround ball with this plastic covering and refrigerate on a small plate.
  7. Soften ball at room temperature before serving, to facilitate the spreading.
  8. Surround with crackers on a decorative serving plate.  This is a winner!

Bolitos de Chocolat y Coco

Bolitos de chocolat y coco

bolitos de chocolat y coco

1985 was a big year for me, for I traveled to Peru-from whence this recipe is derived-that summer to study food, while later in September I went to Paris, with the intent of moving my business there. (Read more about my time in France in Balsamic Vinaigrette, 2016/08/22.)

My jocund days in Peru were filled with the warm blazing sun, but nights were very cold, as July brings winter to this nation in the southern hemisphere.

Machu Picchu met my love for mountains in a grand way.  The ancient trail leading to these ruins made for an arduous climb; we got off the train and labored, with copious sweat, for hours to complete its last leg.  What a memorable day!

My far-reaching, historical catering business was three years old during my time in South America, in the 1980’s, and my mind was a sponge for details about food. While there, every morsel that went into my mouth came out as a comment in my journal.  Most of this keen eating took place in inexpensive cafes, where chickens were always roasting on open hearths.  The better of these humble restaurants had guinea pig and Cebiche, raw white fish “cooked” in lemon juice.  Street vendors’ food also provided me with rich information, but my greatest joy was the private dinner invitations I received, to both rich and poor homes.  Note: there are only these two classes there.

Karen, my then neighbor in Billings, Montana, and her Peruvian boyfriend inspired me to make this colorful sojourn.  Indeed Chino’s family blessed my trip: I may not be alive today, but for them, as great trauma occurred for me in this country. Fortunately for me, his family was extremely influential; for instance, his second cousin was president during my visit.  (This man was ousted a number of days after I left; Chino’s brother-in-law was murdered by terrorists several months later.)

My trouble came when I and my traveling companion, a longtime friend from Paris, let down our guards.  We always covered each other’s backs in the marketplace, as robbery is ever-present in this poor nation; we, however, went our separate ways one day in Cusco.  On my own, I was mesmerized by the wide array of vendor’s goods: blankets on the ground displayed raw meats, brightly dressed women loudly announced their vibrant vegetables, modest pots and pans were set up elsewhere.  Stopping I indulged in a delicious, doughnut-like pastry; next, I reached for my funds to buy freshly squeezed orange juice.  My wallet was gone!

Absolutely everything of importance was in it: my passport, money, travelers’ checks, credit cards, and return ticket home.  This unseasoned traveler was without identity and provision in a volatile place.

God’s grace got me to my homeland safely through a multitude of miracles. The last of these happened just hours before my plane’s departure, for the president of Aero Peru, a friend of Chino’s family, reinstated my plane ticket at this critical moment.

Even before I experienced this culture, my repertoire of catered meals included a Peruvian dinner. The background for this authentic repast came from a cook book, from that country, shared by Chino’s girlfriend; nevertheless, this account was strictly for the upper class.  For hors d’ouvres at these events, I used the youth’s favored dish Ocopa-chunks of boiled, bland purple potatoes, topped with cheese, walnuts, mild chiles, and eggs. The main course boasted of Aji de Gallina, an incredible walnut chicken. Dessert was Suspiro Limeno, a light, airy custard; the feast ended with Bolitos de Chocolat y Coco.  To this day, these chocolate/coconut balls are the finishing touch at ever meal I host.

Chocolate has an interesting history.  Spanish explorer Hernando Cortez introduced cocao beans to Europe in 1528, when he returned from “New Spain”.  There the Aztecs mixed cocao paste with spices to make a thick drink.  In their convent at Oaxaca, creative Spanish nuns added sugar, which made this chocolate beverage even more palatable.  1

Chocolate was highly prized then and still is today; these superb, truffle-like candies-a rich man’s food in Peru-will please any chocolate lover.  This recipe is simple and foolproof; don’t miss this delectable treat.

  1. James Trager, The Food Chronology (New York: Henry Holt and Company, 1995), p. 89.
Making bolitos de chocolat y coco

chocolate after stirring in coconut

Bolitos de Chocolat y Coco (Peruvian chocolate/coconut balls)  Yields: about 6 dozen balls. Total prep time: 45 min.

12 oz unsweetened chocolate  (Baker’s works well.)

1-14 oz can sweetened condensed milk  (It’s important to use Borden’s Eagle Brand.)

2 tsp butter

2 c unsweetened fine-flake coconut  (Available in bulk at our local Winco and other supermarkets.)

  1. Break chocolate into pieces in a medium-size, heavy-bottom saucepan.
  2. Add butter, melt slowly over low heat.  Watch carefully, so as not to burn.
  3. Meanwhile open the can of milk and place 1/2 c of coconut in a measuring cup.  Set aside.
  4. When chocolate is completely melted, quickly add condensed milk.
  5. Stir over low heat for about 30 seconds; it will start forming a soft ball. Toward the end of the 30 seconds, stir in the coconut.  Do not overcook, or chocolate will be dry.  Immediately remove from heat after these 30 seconds; continue to stir vigorously until soft ball is formed all the way.  See photo.
  6. Cool just enough for handling.
  7. Place 1/2 c of coconut in a small bowl.  (You will add more coconut to the dish as needed.)  Form small balls of chocolate and roll in coconut, placing them in an 8×8 inch pan.
  8. Chill chocolate for several hours; then, transfer balls to a freezer-storage bag.  These will keep for a very long time, if you double the bag for long-term freezing.
  9. Excellent chocolate, so easy, absolutely foolproof.


Balsamic Vinaigrette

Teaching my balsamic vinaigrette recipe

teaching my balsamic vinaigrette recipe

I acquired my beloved vinaigrette recipe in enchanting Paris.  There I learned the secrets to this simple receipt in the fall of 1985.

At that time I cooked many historical meals at a French friend’s apartment, close to the Louvre. Mornings found me seeking needed ingredients at a profusion of quaint Parisian shops.  There was much mercy for my broken French among the shop owners, who grew to know me.

A flurry of grand entertainment resulted from the hosting of these elaborate meals.  Our varied guests returned warm hospitality in their abodes on alternate nights.  My passion for art galleries quickened during the days when they reciprocated our harmonious feasting.

Indeed, Paris charmed me during that September in the mid-1980s!

My balsamic vinaigrette is extremely simple.  (We used raspberry vinegar for this same recipe in Paris.)  I always dress my famous salads with this balsamic and my father’s blue cheese dressings, which is next week’s tantalizing post.

Peggy’s Balsamic Vinaigrette  Yields: about 22 ounces.  Total prep time: 20 min. Note: may repeat these easy steps to make a double batch; keeps well when refrigerated; any kind of vinegar may be substituted for the balsamic.

5 lg cloves of garlic, more to taste if smaller

3/4 c balsamic vinegar  (Use protected Aceto Balsamico from Modena, Italy, which can be expensive, available reasonably at Trader Joe’s.)

3/4 tsp dried oregano leaves  (A great, organic dried oregano is available at Trader’s for $1.99.)

1 tsp dried basil leaves  (Also a bargain at Trader’s.)

1/4 tsp sugar, or to taste

1/2 tsp salt, or to taste  (Himalayan, pink, or Real Salt is critical for optimum health; an inexpensive fine grind Himalayan salt can be found at Costco.)

1/2 tsp fresh ground pepper, or to taste

1 tsp high quality mustard  (Aiola mustard from Trader’s is ideal.)

1 c Bel’Olio Extra Light Olive Oil  (I prefer this light olive oil, available at Costco; other olive oils are strong in taste.)

  1. Peel and cut garlic cloves in half; place in a dry 11-cup, or larger, food processor; chop garlic, stopping machine to scrape down sides.  IF you are making two recipes, chop the garlic for both at once; set half aside. (If you don’t have a food processor, may chop cloves fine with a sharp knife; may also use a Vita Mix or blender to make dressing.)
  2. Add vinegar, herbs, sugar, salt, pepper, and mustard to the garlic.
  3. Turn on processor; leave running.
  4. pouring oil in feeder

    Fill the feeder with oil. (The feeder is the plunger that fits in the top of the food processor; it has a small hole in the bottom of it; this allows the oil to drip into vinegar mixture slowly, thus emulsifying the dressing; see photo.) Use all the oil in this manner.  If you are using a blender, be sure to add oil very slowly, blending as you go to emulsify dressing.

  5. Adjust seasonings to taste.  Note: the garlic should taste really strong, as it mellows dramatically after a couple of days.
  6. Pour into bottles, using a funnel.  Save used glass jars for this purpose; be sure to sterilize.
  7. Keeps in the refrigerator for months, or at room temperature for several weeks.  It’s often necessary to leave dressing out at room temperature, for at least an hour before using, when stored in the refrigerator, as the cold oil sometimes solidifies.  Hot tap water will melt the solid oil, also.

Scottish oat scones and more…

20160430_103137

One spring day in Montana’s Big Sky country changed my creative life forever.  An imaginative oil painting of mine was drying in the living room; my tiny, efficient kitchen brimmed with Spanish tapas; I was entertaining the arts and entertainment editor of the Billings Gazette, whom I knew from my acting world.  She was going to review my article on the historical buildings of this largest city in Montana, for my hopes were she would publish it. She spoke prophetically over me, as we indulged in our lavish repast:  “Leave these other artistic quests; seek your true strength of creating quaint, delectable foods; start catering!”

Thus, I launched my business in 1982, with all the passion of my former poetic attempts.  My first catering assignment was that June, when this editor published her article on one of my French dinners, thus giving the needed exposure to my new dream.  It was a marvelous meal of bouillabaisse (fine fish stew) with all the trimmings; a memorable evening that marked the beginning of my knowing the joy of my life’s calling.

This fire in my soul originated in southern Montana, but in a very short time my eager endeavors spread north, for I catered elegant historical feasts on trips to my home town, of East Glacier Park, and the surrounding area. Here groups would have me return each summer to present my “latest creation”.

One such group had me cater my delicacies to them yearly, for several decades.  How they blessed me: they treated me like fine gold as a guest in their home; they paid for luxurious, needed massages during my intense labors; there was a memorable night sleeping on their sailboat on Flathead Lake; and so much more…

An old-time friend invited me over for this scone recipe during one of these trips north; hence, I fell in love with this slightly sweet, nutty breakfast delight from Scotland.  I have been making these scones ever since, for they held me spell-bound on that morning in the early 1980’s.  I am convinced you’ll be sold on them, too.

Scottish Oat Scones  Yields: 12 servings.  Total prep time: 40 min/  active prep time: 20 min/  baking time: 20 min.

1 egg

2/3 c butter, melted and slightly cooled

1/3 c milk or cream

1/4 c sugar  (Coconut or cane sugar is best.)

1 1/2 c whole wheat pastry flour  (Optional: may grind 1 c organic soft, winter wheat berries to make a total of 11/2 c flour.)

1/2 c unbleached white flour  (I prefer Bob’s Red Mill.)

1 1/4 c old fashioned rolled oats  (Organic is best, available in bulk at most supermarkets.)

1 tbsp baking powder

1 tsp cream of tartar (Much cheaper when you buy this in the bulk food section; be sure to save empty spice jars for storage; date the jars and replace with fresh spices yearly.)

1/2 tsp salt  (Himalayan, pink, or Real Salt is critical for optimum health; an inexpensive fine grind Himalayan salt is available at Costco.)

1/2 c currants, raisins, or cranberries

Spray oil  (Coconut spray oil is best for flavor and quality.)

  1. Preheat oven to 400 degrees.
  2. Beat egg in a large bowl; mix in butter and milk.  Add sugar and beat well.
  3. Place all other dry ingredients except fruit in a sealed storage bag.  Shake well.  Add this to above liquid mixture, beating just until mixed thoroughly, as over-beating toughens pastries.
  4. Stir in fruit.  IF using freshly ground flour, let dough sit for 45 minutes, as this is a courser grind and absorbs the liquid more slowly than store bought flour.
  5. Shape dough to form a ball; pat out on a cookie sheet, sprayed with oil, to form an 8-inch circle. Mark 12 wedges in dough with a sharp knife. (Note: You may bake this on an ungreased stone, which will require a longer baking time.)
  6. Bake until golden brown in center of oven for about 12-17 minutes.  (Time will vary with cookie sheet vs. stone; stone will take up to 30 minutes.)  Center should be slightly moist; do not over bake.
  7. Remove from oven and cool on pan for 5 minutes; transfer to serving plate.  May serve warm, or at room temperature.  Enjoy!

1960s French Dinner

Cotes de porc braises a la moutarde

cotes de porc braisees a la moutarde

I have a repertoire of what I call my childhood recipes, of which the following is one of my favorites.  It stretches my imagination every time I eat it: I can hardly believe that food tastes this good!

My Culinary Heritage

My mother taught me so much about cooking; she was excellent at this endeavor in her day.  My mentor exercised her expertise with hospitality in our home, rather than in our family restaurant, inspiring me to follow in her footsteps with her extensive gourmet preparations.

The passing on of tradition from generation to generation is so important.  I’ve never married, but I have a vast quiver full of spiritual children-more than I can count!  Thus, I have a desire to give them what was so freely given to me, which is wisdom.  I gaze at this precise diamond through the perspective of food, with all its joys and health-providing benefits.  I am so grateful to God, my parents, and my entire family for this knowledge that was birthed in me.

Childhood Comfort Foods

We all identify with comfort foods, especially those from our youth.  I will offer numerous ones, with which my mother nurtured our family’s souls.  Cotes de porc braisees a la moutarde is my first choice in this marvelous journey into the past.

Time-Life Books Foods of the World

Time-Life Books put out a series of cook books entitled Foods of the World, showcasing the cuisines of numerous countries in the mid-twentieth century.  Mom subscribed to these superb sequel; my family and our guests experienced incredible pleasure as a result.  Hence I grew to appreciate the world, through its food in the confines of my home at a very young age.  This instilled an appetite in me, which was gratified in my twenties and thirties, when I went to the nations to study their eating habits.

Receipts for Braised Pork Chops

For another great pork recipe, using cream and mustard, inspired by Julia Child, see Cotes de Porc Sauce Nenette.

I have greatly simplified the following recipe for pork loin chops from its original complex detail in Time-Life Books.  My version is uncomplicated and literally explodes with unforgettable flavor!  Enjoy…

Cotes de Porc Braisees a la Moutarde  Yields: 4 servings.  This recipe is adapted from Foods of the World: The Cooking of Provincial France, M.F.K. Fisher and the Editors (New York: Time-Life Books, 1968).

4 center-cut, boneless pork loin chops, about 1 1/4″ thick

salt and fresh ground pepper, to taste  (Himalayan, pink, or Real Salt is critical for optimum health; an inexpensive, fine grind Himalayan salt is available at Costco.)

flour for dusting meat

2 tbsp butter, 2 tbsp oil  (Coconut or avocado oil is best, as olive oil is carcinogenic when heated to high temperatures.)

1 lg yellow onion sliced, about 2 c of 1/8″ slices

3 tbsp wine vinegar

3/4 c heavy cream

2 tsp Dijon mustard

1/4 tsp lemon juice

Serve with brown rice  (My favorite is brown basmati rice; available at Trader Joe’s.)

  1. Heat butter and oil in a large, heavy skillet, over medium heat.  Wash pork chops and lightly pat dry; salt and pepper generously.  Dredge in flour, shaking off all excess.  Sautee in hot oil for 2 minutes on each side; do not overcook. Remove from pan; set aside.
  2. Add onions to pan, stirring in pan drippings well.  Sweat onions (cook until translucent).  Add vinegar, scraping the bottom of the pan; cook until most of moisture is gone.
  3. Add cream.  Stir well and bring to a boil over medium heat.  Place pork chops in onion mixture, coating well with onions/sauce.
  4. Cook until pork chops are hot; do not overcook.
  5. Take off heat; stir in mustard and lemon juice, mixing into the onions by moving around the chops with a spatula or spoon.  Adjust seasonings.
  6. Serve immediately with steamed rice and be wowed!

Cocoa Bread from 1920’s Portland, Oregon

Roaring twenties' cocoa bread

‘roaring twenties’ cocoa bread and fresh rosemary loaf

The spell-binding Cupid’s Book was a cookbook published twice in this city of roses in the 1920’s.  The downtown retailers enticed the brides-to-be into their shops with colorful advertisements, bountiful recipes, and good instructions on how to be a wife in these two editions.

The recipe for cocoa bread is the best of this collection.  It is a slice of heaven!  Unsweetened cocoa powder lends a flavor to this yeast loaf that makes one think of pumpernickel, with the first bite.  Hints of chocolate surface as one experiences it further.

I discovered this blessing, while I was researching at the Oregon History Center’s excellent library, during my graduate work.  1991 marked the completion of  my Master’s Degree, at which point I had exhausted every inkling to food in this archive.  My 114 page thesis, which they have on file,  closely documents the library’s details on nutrition.  It was here that I found the two romantic cook books appropriately named Cupid’s Book.

Bread is the staff of life!  It sustains one’s soul when made with love from scratch.  I grind the flour for all my bread from organic hard red spring wheat berries.  My understanding is these-of all the wheat berries-have the highest content of protein.  One serving has 7 grams of this compound, the same as an egg.

The superb quality of the freshly ground flour allows the bread to last for up to six weeks in the refrigerator.  It is, however, necessary to wrap it in paper towel to absorb the moisture, which keeps it from molding; always store the bread in an air tight storage bag.  Toasting it brings out optimum freshness.

Making bread with a food processor is quick and mess-free.  I encourage you to venture out using my technique; learning this will bless you with easy, homemade bread forever.

Be nourished by the baking and eating of this luscious loaf.!  Also recommended is my receipt for chocolate scones (see chocolate scones).

bread dough in food processor

bread dough after kneading twice in processor

Cocoa Bread  This is adapted from a recipe in Cupid’s Book (Portland, Oregon: Oregon History Center, 1921, 1925). Yields: 1 loaf.  Total prep time: 3 hr/  active prep time: 30 min/ inactive prep time: 2 hr/  baking time: 30 min.

1/4 c tepid water (Temperature should be 105-115 degrees.)

1  individual package active dry yeast  (May use 3 level tsp of Red Star Active Dry Yeast, available in a 2 lb package at Costco, which keeps well sealed in the freezer.  Yeast is best at room temperature for proofing.)

1/3 c, plus 1/4 tsp sugar  (Organic cane sugar is ideal; available at Trader Joe’s in 2 lb package, or less expensive at Costco in 10 lb package.)

2 1/2 c whole wheat flour  (Bob’s Red Mill flour is high quality.)

1 1/2 c unbleached white flour  (You may grind 2 2/3 c organic hard red spring wheat berries to make the total 4 c of flour.)

1/3 c unsweetened cocoa powder

1 1/4 tsp salt  (Himalayan, pink, or Real Salt is critical for optimum health; a fine grind Himalayan salt is available inexpensively at Costco.)

1 1/4-1 1/2 c tepid milk, 110-115 degrees  (May use alternative milks, such as hazelnut or almond.)

3 tbsp oil  (Any kind of oil will do, for oiling the inside of a 13-gallon plastic bag.)

Spray oil  (Coconut spray oil is best.)

  1. Dissolve yeast and 1/4 tsp sugar in 1/4 cup water.  Let sit until it foams, looks creamy, and is nearly doubled in size, about 10 minutes.
  2. In an 11-c-or-larger food processor, blend well the flour, sugar, cocoa powder, and salt.
  3. dough after first kneading of 35 seconds

    Add yeast mixture and 1 1/2 c milk to flour mixture (only 1 1/4 c milk will be needed, however, if grinding your own flour, as the grind is coarser and doesn’t absorb as much liquid.)  Knead for 35 seconds, see photo.

  4. Let rest for 4 minutes; then, knead one more time for 35 seconds (see photo at top of recipe). Note: processing dough will heat it and kill the yeast if cooling isn’t allowed.
  5. dough after kneading by hand

    Take out and knead by hand for about 8 minutes, or until satiny smooth (see photo).  This process is relatively foolproof, but if dough is too wet and sticky, add flour to board to facilitate kneading; it helps to wash hands, if dough is sticking to them.  Dough should be firm, elastic, and smooth to the touch after kneading.  If, however, it is too stiff to knead easily, place in machine, and knead in 1 tbsp water.  Repeat this last step, if needed, until severe stiffness is gone, it is flexible, and kneading by hand is facile, carefully resting dough as not to overheat.  It should be firm and satiny smooth when finished kneading by hand.

  6. Place in a 13-gallon plastic bag, in which several  tbsp of oil are evenly distributed. Let rise in a warm place for 60 minutes, or until double.  (Only if you’re grinding your own flour, punch dough down and allow to rise an additional 30 minutes. for lighter bread with coarser freshly ground flour.)
  7. Punch down and form into a loaf.  Place in a bread pan sprayed with oil; loosely drape a piece of plastic wrap also sprayed with oil over loaf.
  8. Let rise 50-60 minutes, or until double.
  9. Important: 30 minutes into the last rising process preheat oven to 400 degrees; this insures oven is ready when bread has fully risen.
  10. Remove plastic wrap when loaf is double.  Bake for 27-30 minutes, or until loaf sounds hollow when tapped on the bottom.
  11. Cool on rack.  Enjoy!