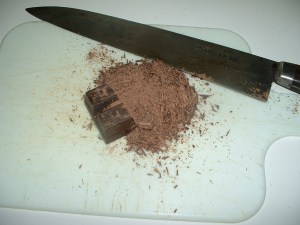
Ozark honey-oatmeal cookies
Here we will look at the detailed history of shortening and the background of early cook books in America, including Miss Parloa’s New Cook Book, 1880; this cook book gives us these delicious Ozark honey-oatmeal cookies.
Early American Cook Books
My library holds many old cook books, some copyrighted in the 1800’s; I also have a number of facsimiles, exact reproductions of the originals. These latter aren’t considered costly with collectors, but are highly valuable to me, with their precise historical evidence required for my work.
A number of these republications help me with my need for early U.S.A. food history. For instance one illuminates the 18th century: American Cookery, by Amelia Simmons; this was the first truly U.S. cook book, with such strictly American dishes as Indian pudding, Indian slapjack (pancakes), and johnnycake (flat corn cakes). 1
All early cook books, that were published on our soil, prior to this 1796 publication, were actually reprints of English cook books, none of which contained American ingredients such as: cranberries, clams, cornmeal, shad (fish of the genus Alosa), terrapin (turtles), etc. 2
Interestingly, recipe books were not in demand in our young country, where rivaling colonial plantations jealously guarded their family’s treasured receipts, and rich city dwellers adhered to their individual Old World cooking traditions. (See Ropa Vieja, for more on the development of American cuisine.) 3
Washburn-Crosby Co. Publishes Miss Parloa’s New Cook Book
In a recent cooking class, I taught Ozark Honey-Oatmeal Cookies from one of my facsimiles: the Silver Dollar City Edition of Miss Parloa’s New Cook Book, which Washburn-Crosby Co. published in Boston originally, in 1880. Its facsimile was issued at an unknown date during the 20th century, by General Mills, the successor to Washburn-Crosby Co. Access the fascinating history of Maria Parloa and her cook books, these two flour mills, and this period cuisine at my following entries: 1800’s Escalloped Salmon, 1880’s Minced Cabbage, and 1880’s Philadelphia Clam Chowder. 4
The History of Shortening
These cookies call for shortening; its definition is fat used in cooking, made from animal, vegetable, or compound manufactured substances. Examples of the latter are margarine, discovered in France in 1869, and Crisco, which is a hydrogenated vegetable oil, created in America in 1911; Crisco usually comes to mind when shortening is mentioned today. 5
The term shortening, however, first surfaced in the early half of 18th century; it is considered to be American. As far as cook books are concerned, it appeared in several of Amelia Simmons’ recipes in American Cookery, 1796, such as johnnycake and “another plain cake”, though she doesn’t define the word shortening, which for her purposes probably meant butter or lard. 6
In the April 6, 1892 edition, the New York Times promoted Cottolene, as a “New Shortening…a vegetable product far superior to anything else for shortening and frying purposes”. This, the first hydrogenated vegetable oil, was primarily used as a cooking medium, in some households. 7
In June of 1911, Procter and Gamble began selling hydrogenated cottonseed oil, as Crisco (short for “crystallized cottonseed oil”); they discovered this shortening in their quest to generate a raw material for soap, through a technique that had its origins in 1897 France. 8
Because of an intense promotional campaign, it became the first popular national shortening product of its kind (this ingredient is extremely prevalent in 20th century recipes). To this day, Crisco remains the best known brand for this item in the U.S.; there are other well-known brands in a number of other countries. 9
Healthy Ingredients in Ozark Honey-Oatmeal Cookies
These Ozark Honey-Oatmeal Cookies allow for a healthy means to satisfy our sweet tooth, for they are made with such powerful foods as: organic oats, semi-sweet chocolate chips, organic raisins, unsweetened coconut flakes, pumpkin seeds, nuts, raw honey, etc. In place of required refined sugar, I use the healthy alternative coconut sugar.
The recipe, from this 1880’s cook book, calls for shortening, which probably referred to either butter or lard initially, though those baking from its facsimile, in the 20th century, would have used then popular Crisco. I leave this choice up to you.
This recipe is easy to make and is extremely good! Enjoy.
References:
- Facsimile of Amelia Simmons, American Cookery, 1796 (Grand Rapids, MI: William B. Eerdmans Publishing Co., 1965), pp. 57, 58.
- Esther B. Aresty, The Delectable Past (New York: Simon and Schuster, 1964), pp. 183-186.
- Ibid.
- Silver Dollar City Edition of Maria Parloa, Miss Parloa’s New Cook Book (Minneapolis: Washburn-Crosby Co., 1880); this facsimile was reproduced by General Mills at an unknown date in the 20th century.
- http://www.foodtimeline.org/shortening.html and https://en.wikipedia.org/wiki/Shortening
- Ibid.
- Ibid.
- Ibid.
- Ibid.

mixing oatmeal into dough in stages
1880’s Ozark Honey-Oatmeal Cookies Adapted from a recipe in General Mills’ 20th century Special Silver Dollar City Edition of Miss Parloa’s New Cook Book, originally published in 1880. Yields: 4 1/2 dozen. Total prep time: 1 hr.
1 3/4 cup flour (May grind 1 1/3 cups organic hard red spring wheat berries, a berry with a high protein content; this makes 2 cups of flour. (BE SURE to remove 1/4 cup of flour, after it is ground, for the required 1 3/4 cup.)
1/2 c butter, or shortening
1 1/4 c sugar (Coconut sugar has the most health benefits; see The Best Zucchini Bread for details.)
2 lg eggs
1/3 c honey
1 tsp baking soda
1 tsp salt (Himalayan, pink, or Real Salt is critical for optimum health; an inexpensive fine grind Himalayan salt is available at Costco for $4.95/5 lbs.)
2 c oats (Organic is only slightly more expensive; so much healthier.)
1/3 c unsweetened coconut flakes (Available inexpensively in bulk at our local Winco.)
1/3 c pumpkin seeds
1/3 c nuts, chopped
1/3 c raisins (Organic is important; available reasonably at Trader Joe’s.)
1/2 c chocolate chips (High quality, semi-sweet chocolate chips are available at Trader’s.)
Parchment paper, wax paper, and 2 cookie sheets
- Preheat oven to 375 degrees.
- If grinding your own flour, begin to do so now.
- In a large bowl, cream butter and sugar with a fork; beat in eggs, one at a time; blend in honey.
-

shaping dough in rough rounds
Stir salt and baking soda into flour, in another large bowl. (Instead, may place these ingredients in a sealed gallon-size storage bag and shake vigorously.)
- Mix this flour mixture into the shortening/sugar/eggs; do not over beat the dough, as this makes cookies tough.
- Stir coconut, pumpkin seeds, nuts, chocolate chips, and raisins into this mixture, distributing evenly.
- Mix half the oats into this dough gently; then, add other half (see photo at top of recipe); stir with a large rubber spatula or spoon, just until blended.
- Using a teaspoon, drop dough 2 inches apart on parchment-paper-covered cookie sheet, shaping rounds roughly with fingers, as you go (see above photo).
- Place pan in preheated oven for about 9-10 minutes, or until golden brown.
- Meanwhile, start shaping dough-rounds on a second parchment-lined pan.
- When first pan is done, immediately start baking this second pan.
-

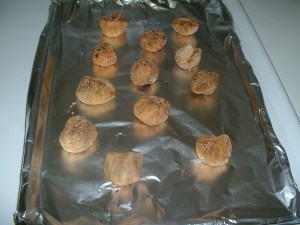
cookies baked to perfection
Cool baked cookies on cookie sheet for 2 minutes (see photo). Remove and place them on a large piece of wax paper.
- Using a new piece of parchment paper, prepare the third pan of cookies, to be ready for the oven as soon as second batch is done (pans should be cool before spooning dough on them-may place them in the refrigerator). Repeat until all the dough is used.
- These freeze well, to have on hand for healthy snacks.